
And now we come to the very last edition of I Love DesktopX. I have to thank all of you who’ve read, commented, and featured this series of articles, because I just wouldn’t keep doing it without you guys support.
This being the biggest month for the holidays, below I’ve decided to feature seasonal skins from the past month. But if you’re not feeling the Christmas cheer yet, we’ve also got 3 non-seasonal skins for you to deck the halls with.

Santa Clock by Doubird

I had Doubird’s Anticko clock up all last month, and it looks like I’ve found my new clock of choice for December. It’s a simply designed clock with a lovely Christmas scene that will bring holiday cheer to your desktop. Makes me want to listen to old nostalgic Christmas songs.
Happy Effin' HO HO by happycamper88

I can totally see anyone having a dismal holiday season getting a kick out this. It’s a bit icky for my desktop, but I find it hilarious nonetheless.
Merry Christmas? Bah effin’ humbug!
WC Community Holiday Suite '09 - Countdown Weather by Island Dog

This countdown gadget is made to match the 2009 Wincustomize Community Holiday Suite of skins. Keep track of how many days before Santa arrives, how many days before you find out what presents everyone got you, or how many days you have left to finish your Christmas shopping. Either way, this is a handy gadget to have, and it takes up very little space on your desktop.
Check out the matching DX desktop, weather, and the full community suite here: LINK
Clear View by Richard Mohler

This is an updated version of the popular Clear View widget. It’s extremely minimal in design, and I love that it takes up so little space. For such a small package you get all your basic tools including weather, clock, media, and system info.
As you might expect with a clear widget, it goes well with pretty much everything.
Hanukkah and Friends DX by Redneckdude

I love this beautiful theme. Nice balance of colors, minimalistic design, easy on the eyes and great on the desktop.
You can get the matching weather widget here: LINK
Find the whole suite here: LINK
R 001 by BoXXi

It’s not all that often you find a killer theme in purple, but if anyone can pull it off it’s definitely Master BoXXi. The original theme was by another author, but I’m glad BoXXi recreated it for DX. Simply put, this theme is the awesome sauce. It’s packed full of user and system shortcuts, system info, and a wallpaper changer, all in one striking layout.
Resolution dependant: 1680 x 1050

Digital Clock Using Images
Sometimes fancy font just doesn’t cut it, especially when you want to make your clock 3D. Making a digital clock with images isn’t as complicated as you might think. We just need about dozen images and a small script.
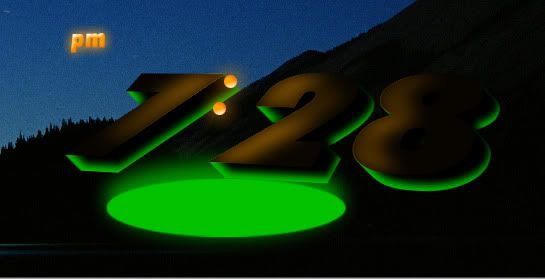
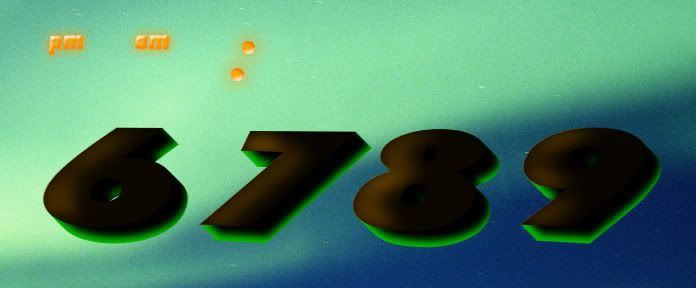
First you’ll create your images, the digits 0 through 9. You will also need a colon, AM, and PM image. Here are some of the ones I used.
The first object we’ll create in DesktopX is the first digit—the ‘1’ in 12:00.
Create a new object. Then add 4 states: “none”, 0, 1, 2. (Why 0 or 2? Because you might want to do a 24 hour clock, in which case you’ll need them for 0600 hours or 2100 hours.)
Apply your images to each state. For the “none” state, leave the image field blank. You can delete the Mouse Away or Default state if you like.

Create another object for the second digit. Add the states: 0, 1, 2, 3, 4, 5, 6, 7, 8, 9. Apply your images to each state.
To save time and energy, clone digit 2 twice for the third and fourth digits. Then, create another object for the am/pm sign. Add the states: “am” and “pm” and apply your images.
Lastly, create your colon object and Group all.
On to the script.
Code: vbscript
- Dim timefrmt : timefrmt = 3 'Called when the script is executed
- Sub Object_OnScriptEnter
- Object.SetTimer 1,1000
- End Sub
Code: vbscript
- Sub Object_OnTimer1
- t = FormatDateTime(Now(), timefrmt) 'get the time
- tparts = split(t,":") 'parse the time
-
- If timefrmt = 3 Then
- phr = tparts(0) 'parse hours
- pmin = tparts(1) 'parse minutes
- psec = tparts(2) 'parse seconds
- psecparts = split(psec, " ")
- ampm = LCase(psecparts(1)) 'parse am/pm from the seconds
-
- '>>>> Set States
- If Len(phr) = 2 Then DesktopX.Object("clock_digit1").state = Left(phr,1) Else DesktopX.Object("clock_digit1").state = "none"
- If Len(phr) = 2 Then DesktopX.Object("clock_digit2").state = Right(phr,1) Else DesktopX.Object("clock_digit2").state = phr
- DesktopX.Object("clock_digit3").state = Left(pmin,1)
- DesktopX.Object("clock_digit4").state = Right(pmin,1)
- DesktopX.Object("clock_ampm").state = ampm '<<<<
-
- ElseIf timefrmt = 4 Then
- phr = tparts(0) 'parse hours
- pmin = tparts(1) 'parse minutes
- If phr => 12 Then ampm = "pm" Else ampm = "am"
-
- '>>>> Set States
- DesktopX.Object("clock_digit1").state = Left(phr,1)
- DesktopX.Object("clock_digit2").state = Right(phr,1)
- DesktopX.Object("clock_digit3").state = Left(pmin,1)
- DesktopX.Object("clock_digit4").state = Right(pmin,1)
- DesktopX.Object("clock_ampm").comments = ampm '<<<<
- End If alignText
- End Sub
Code: vbscript
- Function alignText
- textalign = "center"
-
- If textalign = "center" Then
-
- DesktopX.Object("clock_digit3").left = DesktopX.Object("clock_colon").right
- DesktopX.Object("clock_digit4").left = DesktopX.Object("clock_digit3").right
- DesktopX.Object("clock_digit2").right = DesktopX.Object("clock_colon").left
- DesktopX.Object("clock_digit1").right = DesktopX.Object("clock_digit2").left
-
- ElseIf textalign = "left" Then
-
- DesktopX.Object("clock_digit2").left = DesktopX.Object("clock_digit1").right
- DesktopX.Object("clock_colon").left = DesktopX.Object("clock_digit2").right
- DesktopX.Object("clock_digit3").left = DesktopX.Object("clock_colon").right
- DesktopX.Object("clock_digit4").left = DesktopX.Object("clock_digit3").right
-
- ElseIf textalign = "right" Then
-
- DesktopX.Object("clock_digit3").right = DesktopX.Object("clock_digit4").left
- DesktopX.Object("clock_colon").right = DesktopX.Object("clock_digit3").left
- DesktopX.Object("clock_digit2").right = DesktopX.Object("clock_colon").left
- DesktopX.Object("clock_digit1").right = DesktopX.Object("clock_digit2").Left
-
- End If
- End Function
The script consists of three simple functions. The first thing is to get it to show the correct time. As always, we use FormatDateTime to get the current system time. To show 24 hour, change the timefrmt value at the top to 4. To show 12 hour, change the timefrmt value to 3.
On the 1-second timer, we splice up the time and set each corresponding object’s state to the correct digit.
Unlike with a text clock, we have to line up the objects manually. So we create an alignText function. I’ll spare you the details, but you can align left, right, or center by changing the textalign value. Obviously, you would need to make adjustments to positioning depending on the images you use.
That's all there is to it. The example dxpack is here: LINK
Thanks for reading and happy DXing!